Playing guitar tablatures in Rust
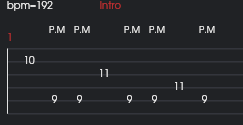
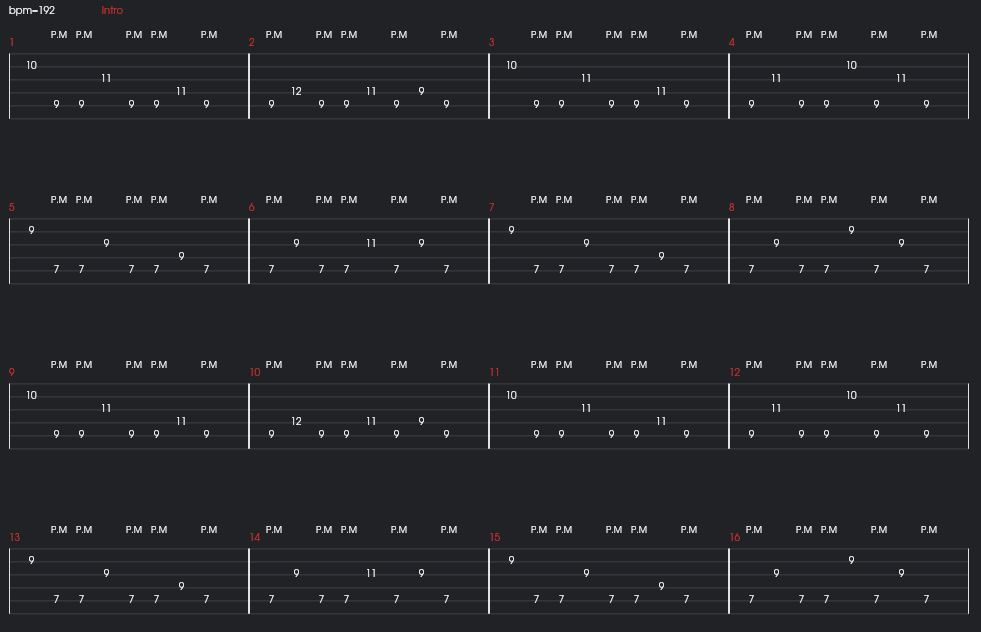
If you ever tried to learn guitar, chances are you are familiar with guitar tablatures.
It is a simple way to visualize music for guitar, using ASCII characters to represent strings and frets as an alternative to sheet music.
For instance, here are the first four measures of the song "Smoke on the Water" by Deep Purple:
e|-----------------|-----------------|-----------------|-----------------|
B|-----------------|-----------------|-----------------|-----------------|
G|-----3---5-------|---3---6-5-------|-----3---5-----3-|-----------------|
D|-5---3---5-----5-|---3---6-5-------|-5---3---5-----3-|---5-------------|
A|-5-------------5-|-----------------|-5---------------|---5-------------|
E|-----------------|-----------------|-----------------|-----------------| <- top
This song is played in standard tuning (EADGBe), which is conveyed by the letters on the left indicating the tuning for each string, while the numbers indicate where to put your fingers on the fretboard.
Beyond the text representation, the de facto standard is the format used by the Guitar Pro software to render and synthesize sound for the tablature.
Those binary files have the .gp3, .gp4, .gp5 or .gp6 extension depending on the software version used to produce them, and can be easily found on the internet on websites such as Ultimate Guitar.
Although the software to play the tablature is proprietary, some versions of the file format are well documented, and there are even open-source projects that can read them.
The best OSS tablature player is probably TuxGuitar which is very feature-rich and a fantastic tool to learn guitar.
Since TuxGuitar appears to be unmaintained and Java based, I thought it would be a fun challenge to write my own tablature player in Rust.
Introducing Ruxguitar
I named my project Ruxguitar, a portmanteau of Rust and Guitar.
The project is still in its early stages, but I believe it is now functional enough to be officially announced to the world - aka this very blog post!
Rather than describing what the project does, have a look at the following video which shows the tablature player in action with a song a bit more complex:
You can obviously find the source code on GitHub with pre-built binaries available for Linux, macOS and Windows.
Feel free to go play with it and come back when you want to read the rest of this post which will detail various aspects of the internals.
Parsing the tablature
The first step in building a tablature player is to parse the binary tablature file.
During my research, I found a specification of the .gp4 file format on dguitar to get started.
The structure of the file is roughly the following:
- file version to know which version of the file format is used
- information about the piece (e.g. title, subtitle, artist, album, etc.)
- lyrics
- number of measures and number of tracks
- measures per track in the following order:
- measure 1/track 1
- measure 1/track 2
- ...
- measure 1/track m
- measure 2/track 1
- measure 2/track 2
- ...
- measure 2/track m
- ...
- measure n/track 1
- measure n/track 2
- ...
- measure n/track m
- within each measure, we find the number of beats to read
- within each beat, we find the beat duration and the number of notes to read
- within each note, we find the string, the fret, the duration, the effect, etc.
I decided to use the nom crate to parse the tablature because I am familiar with it for parsing binary format.
Here is a quick peek at the code driving the parser so you get an idea of how it looks:
pub fn parse_gp_data(file_data: &[u8]) -> Result<Song, RuxError> {
    let (rest, base_song) = flat_map(parse_gp_version, |version| {
        map(
            tuple((
                parse_info(version),
                cond(version < GpVersion::GP5, parse_bool),
                cond(version >= GpVersion::GP4, parse_lyrics),
                cond(version >= GpVersion::GP5_10, take(19usize)),
                cond(version >= GpVersion::GP5, parse_page_setup),
                cond(version >= GpVersion::GP5, parse_int_sized_string),
                parse_int,
                cond(version > GpVersion::GP5, parse_bool),
                parse_signed_byte,
                cond(version > GpVersion::GP3, parse_int),
                parse_midi_channels,
            )),
            move |(
                song_info,
                triplet_feel,
                lyrics,
                _master_effect,
                page_setup,
                tempo_name,
                tempo,
                hide_tempo,
                key_signature,
                octave,
                midi_channels,
            )| {
                // init base song
                let tempo = Tempo::new(tempo, tempo_name);
                Song {
                    version,
                    song_info,
                    triplet_feel,
                    lyrics,
                    page_setup,
                    tempo,
                    hide_tempo,
                    key_signature,
                    octave,
                    midi_channels,
                    measure_headers: vec![],
                    tracks: vec![],
                }
            },
        )
    })(file_data)
    .map_err(|_err| {
        log::error!("Failed to parse GP data");
        RuxError::ParsingError("Failed to parse GP data".to_string())
    })?;
    // parse tracks & measures
    ...
The heavy lifting required to parse the tracks and the measures is done in a different function that will be skipped for brevity.
At some point it became quite tedious to handle the various versions of the file format and I decided to focus on the .gp5 version which is widely used.
To be honest, this part was rather challenging because the file format is quite complex and the documentation is not always clear.
Luckily I was able to inspect the parsers from TuxGuitar and the guitarpro crate to get a better understanding of the file format.
To ensure correctness, I have written a few unit tests for specific tablature files to check that the parser is working as expected.
This approach is useful to get started but not very scalable, so I am also validating some high level invariants of the resulting Song structure over a directory containing several hundred tablatures.
I found a few bugs in the parser this way, and I am confident that the parser is working as expected.
Building a UI
At this point, we have an in-memory representation of the tablature but no way to display it.
Not only should the user be able to see the tablature but also be able to interact with it.
I really wanted to use a native GUI library to ensure that the application would look and feel like a native application on all platforms.
The state of GUI libraries in Rust required me to do some research.
I needed a truly event-based library to handle the synchronization during playback while also being able to draw the tablature in a custom way with some kind of canvas abstraction.
Based on those requirements, I decided to give Iced a spin as it checked all the boxes.
Spoiler alert: I am very happy with my choice so I did not try other libraries.
Iced
The Iced library is very well written but could benefit from a bit more documentation.
I recommend reading the source code of the examples to get a better understanding of how to use the library.
I started with the text editor example which I slowly adapted to my needs.
At some point, I ran into a bug in version 0.12.0 which forced me to upgrade to the 0.13.0 version which was not released yet.
This means I had to use the main branch of the Iced repository which was a bit scary but it worked out fine.
All the breakages I encountered were due to the Iced library being in active development and I am very grateful to the maintainers for their hard work.
The library is architectured around messages and subscriptions that trigger the update of the UI.
For instance, those are my messages:
#[derive(Debug, Clone)]
pub enum Message {
    OpenFile, // open file dialog
    FileOpened(Result<(Vec<u8>, String), PickerError>), // file content & file name
    TrackSelected(TrackSelection), // track selection
    FocusMeasure(usize), // used when clicking on measure in tablature
    FocusTick(usize), // focus on a specific tick in the tablature
    PlayPause, // toggle play/pause
    StopPlayer, // stop playback
    ToggleSolo, // toggle solo mode
}
And this is the simplified application entry point:
impl RuxApplication {
    pub fn start(args: ApplicationArgs) -> iced::Result {
        iced::application(
            RuxApplication::title,
            RuxApplication::update,
            RuxApplication::view,
        )
        .subscription(RuxApplication::subscription)
        .theme(RuxApplication::theme)
        .font(ICONS_FONT)
        .centered()
        .antialiasing(true)
        .run()
    }
}
The application is built around functions that are orchestrated by the Iced engine appropriately.
The update function has the signature Fn(&mut State, Message) -> C where:
Stateis the application state that can be modified (hereRuxApplication)Messageis the message to processCis an outputTaskpotentially producing a newMessage
The view function has the signature Fn(&'a State) -> Widget and renders a Widget based on the current &State.
Drawing the tablature
I started by crafting the code which carefully draws a single measure on an Iced::Canvas.
This means:
- drawing each string
- for each beat, drawing the notes on the strings and potential beat effect (e.g. palm mute)
- for each note, adding the potential note effect (e.g. slide, hammer-on, bend)
- annotate the measure with additional information (e.g. measure number, tempo, part annotation, chord)
It required a bit of trial and error to get the offsets right but I am happy with the result.
Once I have a collection of canvas measures, they are assembled in a responsive grid layout to display the whole tablature using the wrap widget from the iced-aw crate.
The measures can have different lengths depending on the number of beats which makes silent measures very small and crazy guitar solo measures long.
Making sounds
To recap, we have an in-memory representation of a tablature and we have the UI, now we need to make some sounds!
What we want is a way to turn each note, for each beat, for each measure, for each track into a specific sound at the right time.
This can be achieved using a MIDI synthesizer which is software that can produce sounds based on MIDI events.
Synthesizing MIDI events
There are different kinds of MIDI events but the most important for us are the NoteOn and NoteOff ones.
- Note On: Indicates that a note is being pressed. It includes the note number (pitch) and velocity (how hard the note is pressed).
- Note Off: Indicates that a note is being released.
For each note in the tablature, we can generate a pair of MIDI events annotated with:
- the timestamp, also referred to as a tick, at which they should be executed.
- the track to which they belong.
pub enum MidiEventType {
    NoteOn(i32, i32, i16),  // midi channel, note, velocity
    NoteOff(i32, i32),      // midi channel, note
    ...
}

pub struct MidiEvent {
    pub tick: usize,
    pub event: MidiEventType,
    pub track: usize,
}
All those events are pushed into a single array sorted by the event tick.
This approach provides an efficient way to find the next events to play at any given time via binary search later on.
Those MidiEvents can be transformed into audio waves using a synthesizer before being sent to the audio output.
For the synthesizer I settled on the rustysynth crate which provides a neat MIDI synthesizer.
Here is a simplified version of the code to play a MIDI event:
let synthesizer_settings = SynthesizerSettings::new(SAMPLE_RATE as i32);
let mut synthesizer = Synthesizer::new(&sound_font, &synthesizer_settings);

let midi_event = // find next event to play
match midi_event.event {
    MidiEventType::NoteOn(channel, key, velocity) => {
        synthesizer.note_on(channel, key, velocity as i32);
    }
    MidiEventType::NoteOff(channel, key) => {
        synthesizer.note_off(channel, key);
    }
    ...
}
It is important to note that a synthesizer requires a soundfont file to produce sound.
For the sake of simplicity, I included the TimGM6mb.sf2 soundfont file in the binary at compile time.
const TIMIDITY_SOUND_FONT: &[u8] = include_bytes!("../../resources/TimGM6mb.sf2");
The trade-off is that the binary is a bit larger but the user does not have to worry about finding the soundfont file.
However, it is possible to provide a larger soundfont file to get better sound quality using the --soundfont command line argument.
For instance, I like to use FluidR3_GM.sf2 which is present on most systems and easy to find online (here or there).
./ruxguitar --sound-font-file /usr/share/sounds/sf2/FluidR3_GM.sf2
Audio loop
The audio output stream is managed by a dedicated thread which will produce sound at a regular interval.
I picked the cpal crate which is a cross-platform audio library.
Here is a simplified version of the code to set up an audio loop:
let host = cpal::default_host();
let device = host.default_output_device().unwrap();

let config = device.default_output_config().unwrap();
let stream_config: cpal::StreamConfig = config.into();

let channels_count = stream_config.channels as usize;
assert_eq!(channels_count, 2);

// 4410 samples at 44100 Hz is 0.1 second
let mono_sample_count = 4410;

let mut left: Vec<f32> = vec![0_f32; mono_sample_count];
let mut right: Vec<f32> = vec![0_f32; mono_sample_count];

// build audio loop
let stream = device.build_output_stream(
    &stream_config,
    move |output: &mut [f32], _: &cpal::OutputCallbackInfo| {
        let midi_events = // find events to play
        for event in midi_events {
            // synthesize events
            synthetizer.process(event)
        }

        // Split buffer in two channels (left and right)
        let channel_len = output.len() / channels_count;

        // Render the waveform.
        synthesizer.render(&mut left[..channel_len], &mut right[..channel_len]);

        // Interleave the left and right channels into the output buffer.
        for (i, (l, r)) in left.iter().zip(right.iter()).take(channel_len).enumerate() {
            output[i * 2] = *l;
            output[i * 2 + 1] = *r;
        }
    }
)
// Start the stream.
let stream = stream.unwrap();
stream.play().unwrap();
For each run of the audio loop, it is possible to compute the next window of time to process by taking into account:
- the current timestamp of the audio player
- the tempo of the current measure
- how much time has passed since the previous interval
const QUARTER_TIME: i32 = 960; // 1 quarter note = 960 ticks

fn tick_increase(tempo_bpm: i32, elapsed_seconds: f64) -> usize {
    let tempo_bps = tempo_bpm as f64 / 60.0;
    let bump = QUARTER_TIME as f64 * tempo_bps * elapsed_seconds;
    bump as usize
}
Using the resulting tick increase, we can efficiently query our array of MIDI events to find the next events to play using binary search.
let tick_increase = tick_increase(tempo, elapsed_seconds);
let next_tick = self.current_tick + tick_increase;
// assume we already have a cursor for the start of the events (a.k.a. the index of the last event played)
let start_index = self.current_cursor;
let end_index = match sorted_events[start_index..].binary_search_by_key(start_index, |event| event.tick)
{
    Ok(next_position) => start_index + next_position,
    Err(next_position) => {
        if next_position == 0 {
            // no matching elements
            return Some(&[]);
        }
        // return slice until the last event
        start_index + next_position - 1
    }
};
// return slice of events to play
return Some(&self.sorted_events[start_index..=end_index])
Now that we have the audio loop running, we can focus on the integration between the audio player and the UI.
Putting it all together
Having a perfect integration is crucial to providing a smooth user experience:
-
when clicking on the "Play" button, the tablature cursor should start moving, the notes should be highlighted as they are played.
-
when a measure is clicked, the player should jump to the corresponding position in the tablature and the correct notes should be played.
-
when clicking on a different track, the whole tablature should be updated to show the new track and the sound should be updated accordingly.
-
when clicking on the "Solo" button, all other tracks should be muted.
-
when clicking on the "Stop" button, the tablature cursor should be reset to the beginning and the sound should stop.
I think you get the idea.
The critical bridge between the audio player and the UI is implemented using the iced::Subscription mechanism.
Subscriptions are a way to listen to external events and publish them as messages to the application.
For instance, here is how the application reacts to pressing the space bar to toggle the playback:
let keyboard_subscription = keyboard::on_key_press(|key, _modifiers| match key.as_ref() {
    keyboard::Key::Named(Space) => Some(Message::PlayPause),
    _ => None,
});
The update function does not care whether the message has been triggered by the keyboard or by clicking on the "Play" button.
Using a similar mechanism, the audio player can send messages to the application to update the UI based on the current playback position.
The application holds the receiving end of a tokio::sync::watch channel containing the current timestamp which is published by the audio thread.
fn audio_player_beat_subscription(&self) -> impl Stream<Item = Message> {
    let beat_receiver = self.beat_receiver.clone();
    stream::channel(1, move |mut output| async move {
        let mut receiver = beat_receiver.lock().await;
        loop {
            // get tick from audio player
            let tick = *receiver.borrow_and_update();
            // publish to UI
            output
                .send(Message::FocusTick(tick))
                .await
                .expect("send failed");
            // wait for next beat
            receiver.changed().await.expect("receiver failed");
        }
    })
}
...
// setup subscription
Subscription::run_with_id("audio-player-beat", audio_player_beat_subscription));
The tablature processes the FocusTick message to update the current measure position and highlight the notes.

A lot of details were required to maintain the illusion that everything is properly synchronized with the user's actions.
Future work
The current version of Ruxguitar is pretty much an MVP to get the project started.
It is nowhere near TuxGuitar in terms of features and usability.
Here are a few ideas for the future:
- support more file formats (currently only
.gp5is supported) - display more information about the tablature (e.g. rhythm, time signature, key signature etc.)
- support repeating measures
- support slowing down and speeding up the playback
Conclusion
I have been working on Ruxguitar over the past year and I am very happy with the result.
Not only did I learn a lot on the way but I also actually built a complex piece of software that appears to work.
Working on such a large project alone required a lot of discipline because there were many times when I felt like giving up, running into cryptic bugs or being stuck on a feature for weeks.
It would have been impossible to build Ruxguitar without TuxGuitar as a reference implementation and I am very grateful for the work done by the TuxGuitar team over the years.
After so much work on this project, it's about time I get back to playing guitar instead of writing software for it!